When I was in 8th grade, I decided I wanted to learn how to play the pipe organ. My previous knowledge of the piano (taught by Rachel Oliver) would prove very useful for this endeavor. I was fascinated by the organ at my church, and I thought it would be a lot of fun to play at church some day. I approached the organist after Mass one day, and asked if she could teach me organ lessons. She agreed to teach me that summer, and she taught me a few lessons to get me started. Although she only taught me the basics, I taught myself from example. Since I didn't have an organ to practice on at home, and I didn't have a license to drive to the church to practice, I decided that I would build a practice organ for myself. My dad showed me some organ sampling software called Hauptwerk, and I found out all the amazing capabilities of the program.
First Pedalboard
|
The first pedalboard, the one I envisioned building when I was in 8th grade, was really a starting point from which to improve. I began construction by building a frame and fabricating pins for the pedals to ride on. Through the years I went through a variety of magnet/reed switch systems to add MIDI capabilities to the pedalboard. The first system I used (the pictures were lost, sadly) featured a piece of wood with a reed switch and diode matrix running sideways halfway along the underside of the pedals. There were magnets attached to the pedals right above each reed switch. After I realized that I wasn't getting enough accuracy halfway down the pedals, I moved the position of the reed switch/diode assembly to the very end of the pedals, where the range of travel would be longer. This method proved to work 100% of the time I used this pedalboard (11th grade through first year at GT).
|
|
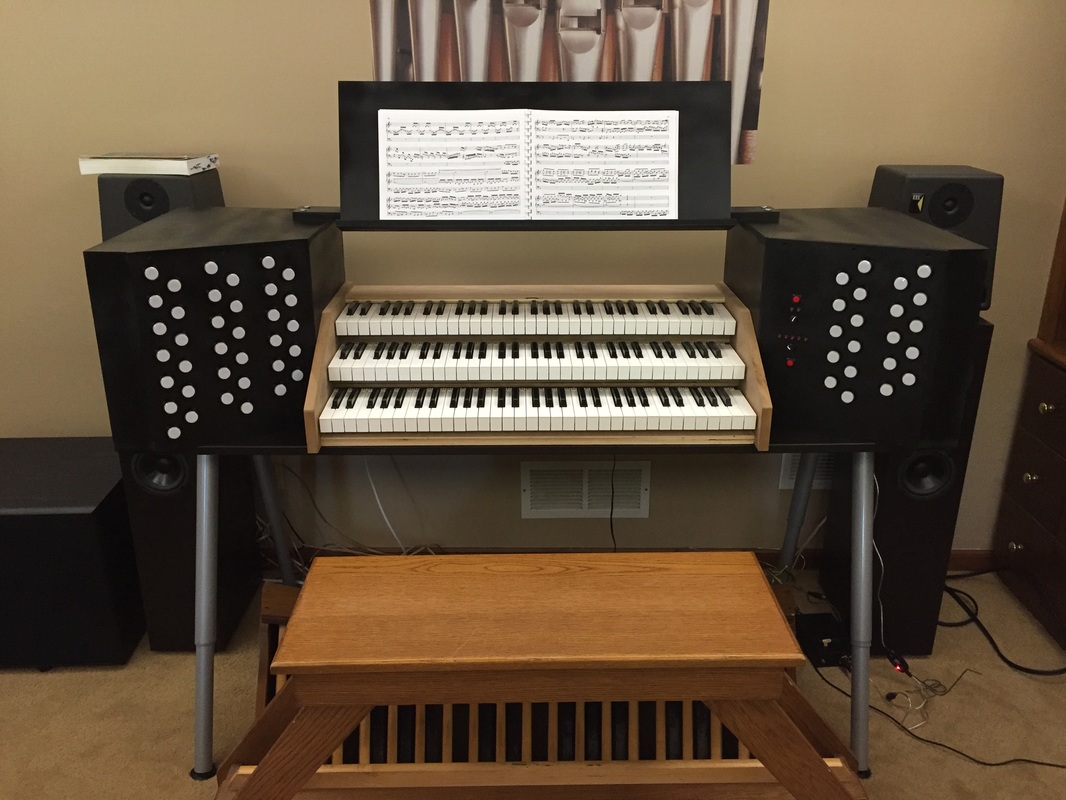
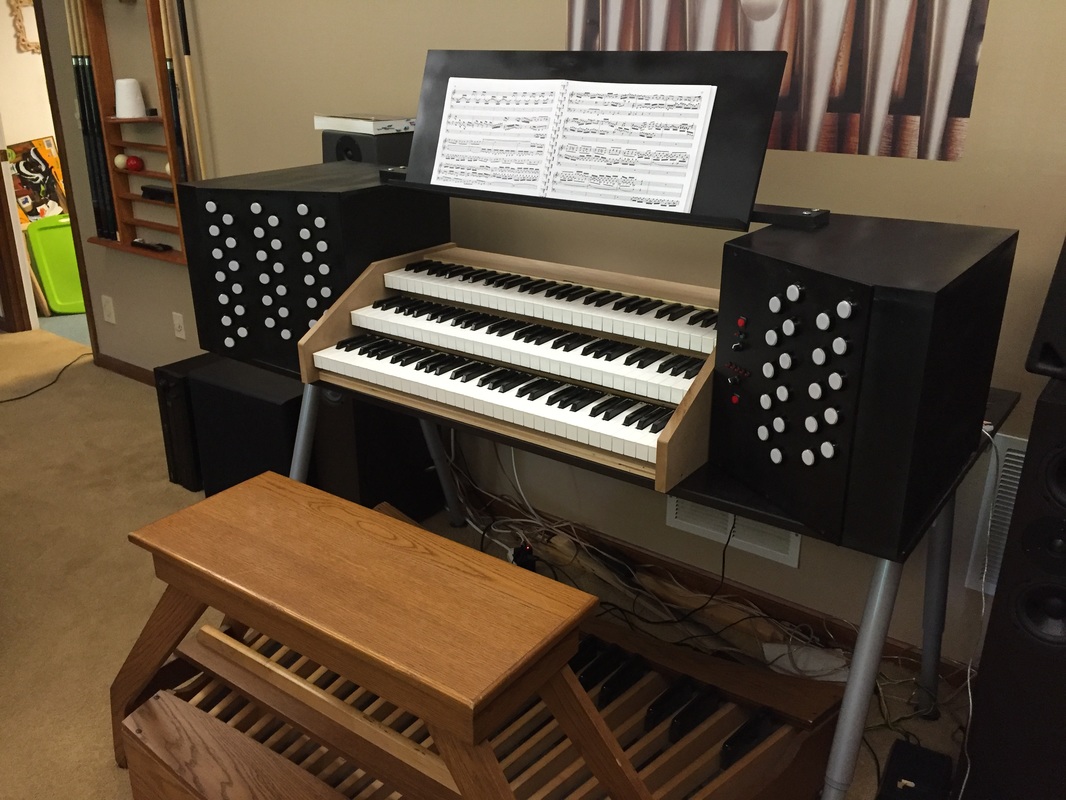
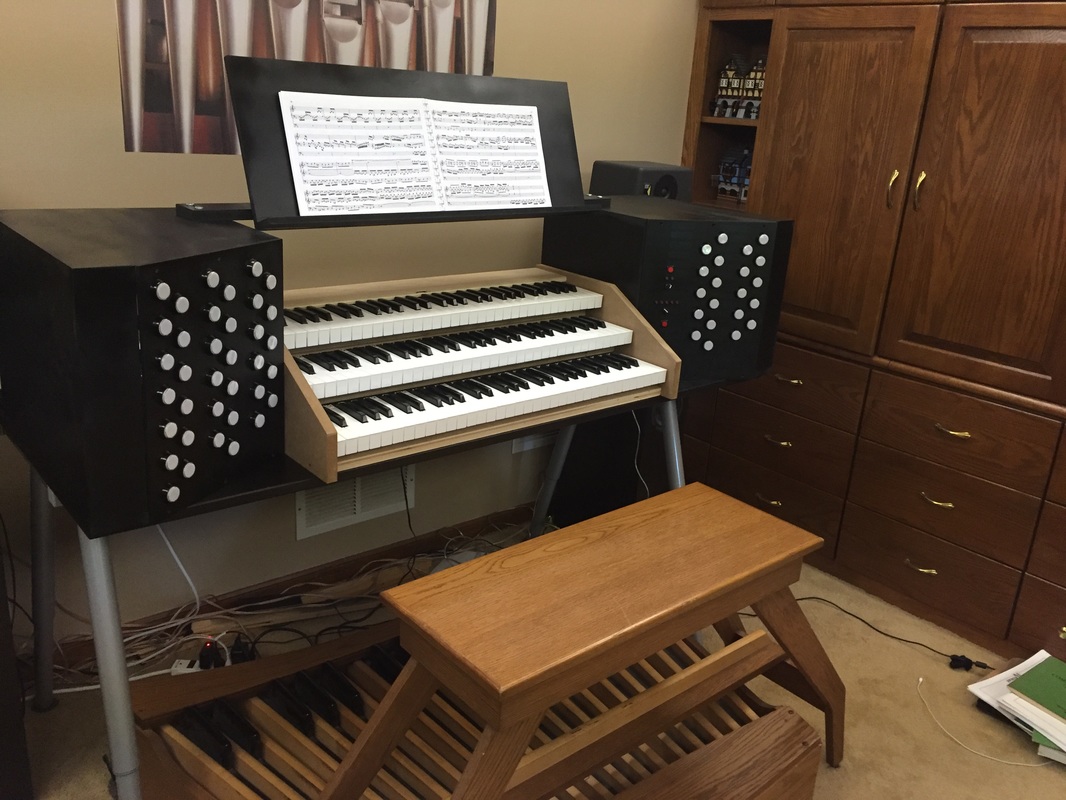
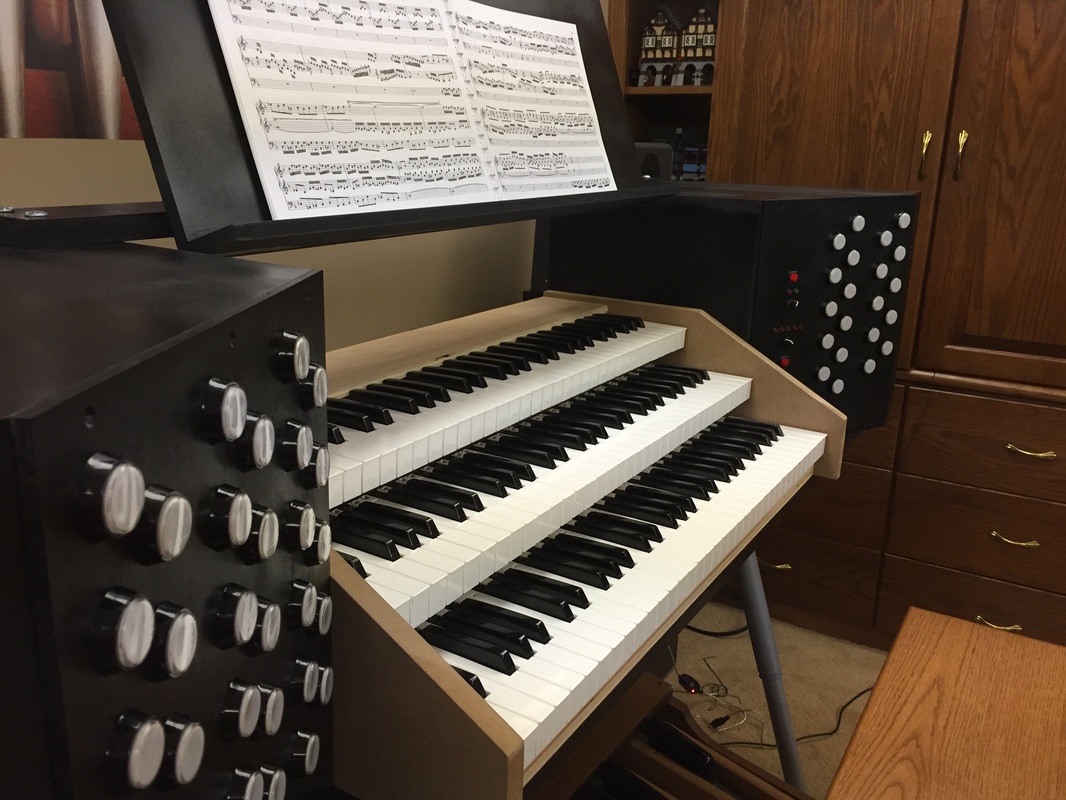
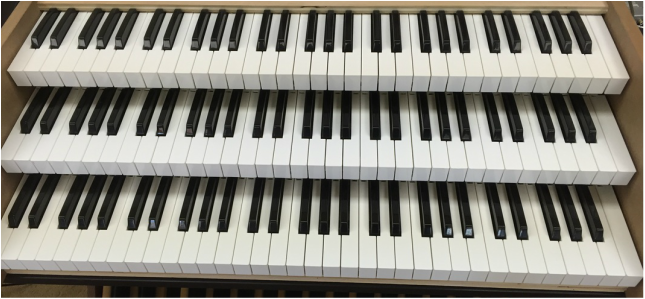
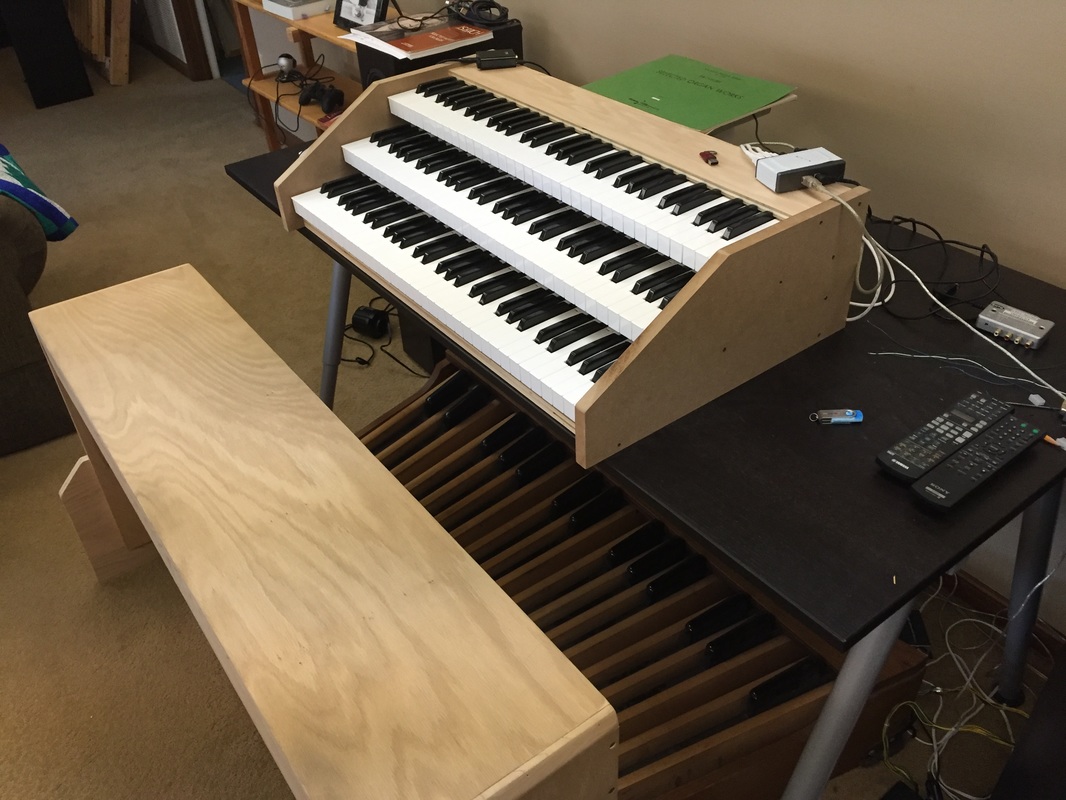
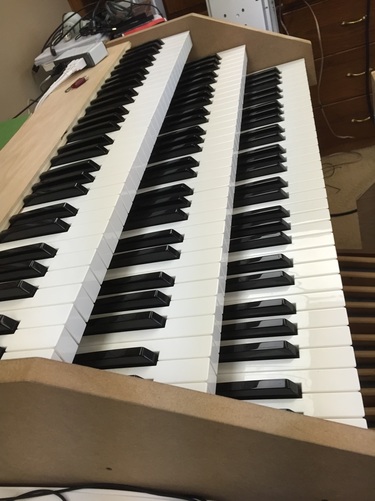
Keyboard Stack and Console
I started work on the keyboard stack around 10th grade, after I got tired of using one keyboard stacked on another. I purchased three M-Audio 61-key MIDI controllers, removed the casing, and attached them to three pieces of wood. For keyboard spacing, I cut spacers out of wood, and set them in place between the keyboard pieces. Then I cut out end pieces out of MDF, and a top piece out of 1/2" ply, and attached all three pieces in place. This keyboard assembly is portable, yet very reliable. All three keyboards can be connected to a computer using USB. The next steps are to paint the wood pieces a non-glossy black, and construct a music desk.
The console is nothing more than a black table purchased from Ikea. This idea was brought up on a Hauptwerk forum, and I decided that it was a simple, yet effective solution, due to the fact that the legs of the table can be adjusted to any height.
The console is nothing more than a black table purchased from Ikea. This idea was brought up on a Hauptwerk forum, and I decided that it was a simple, yet effective solution, due to the fact that the legs of the table can be adjusted to any height.
|
|
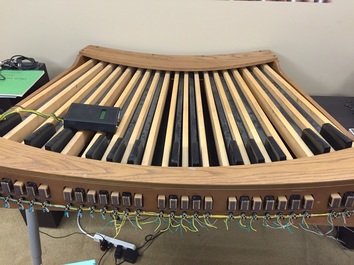
Second Pedalboard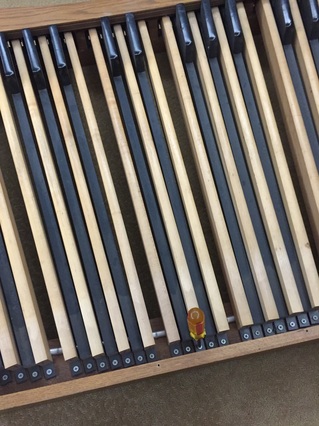
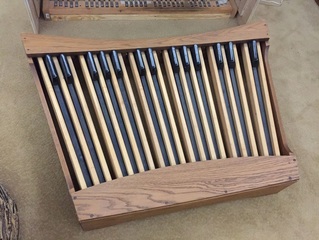
|
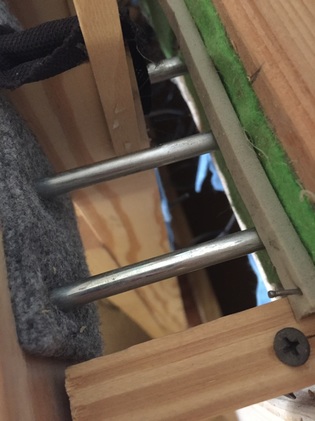
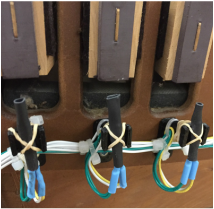
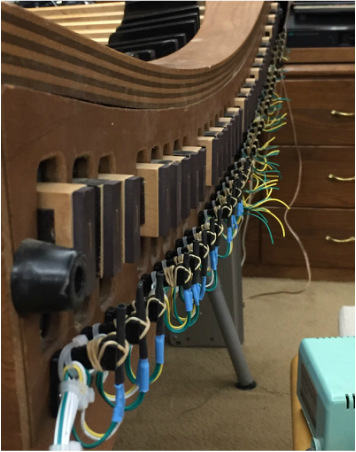
Over the 2015 Winter Break, the organist at my church offered me an old pedalboard from his warehouse. I gladly accepted his offer, and soon had my hands on a real organ pedalboard. Some of the notes had some "slop" in them; they would take a few seconds to stop bouncing after they were released. I quickly dealt with this problem by taking off the bottom board and tightening each screw to adjust each pedal to the proper tension. The pedalboard had magnets attached to the end of each pedal, so moving the MIDI encoder from my first pedalboard was a straightforward task. As you can seen in the picture below, I rewired the reed switch/diode assembly with a heat shrink wrap protection, and secured them to 3D printed pieces designed to hold the assemblies a fixed distance away from each magnet's travel. All the wires were secured neatly to the base of each 3D printed piece. It was just a matter of adjusting each switch assembly to the right height before the pedalboard was in working order.
|
|
Arduino-based MIDI controller
The MIDI encoding is handled by an Arduino. A 10 by 4 diode matrix was used alongside an LCD text display for testing/troubleshooting. Each pedal has its own "address" in the matrix, such as 4th output, 2nd input. Each address is mapped to a certain MIDI note. The Arduino is programmed to scan the matrix constantly and detect any changes of the state of the matrix. When a change occurs, the Arduino takes the mapped MIDI note and sends a note-on or note-off respectively. The Arduino is also equipped with a MIDI thru feature, which allows the user to pass through MIDI from another source, such as expression pedals.
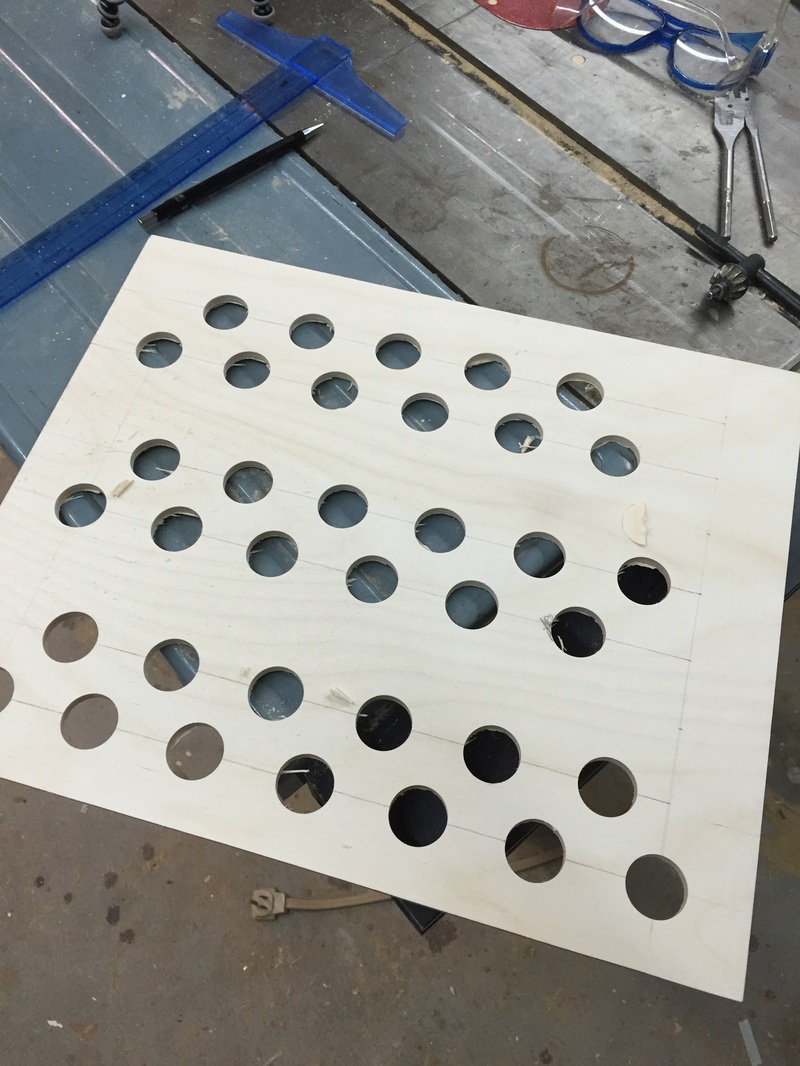
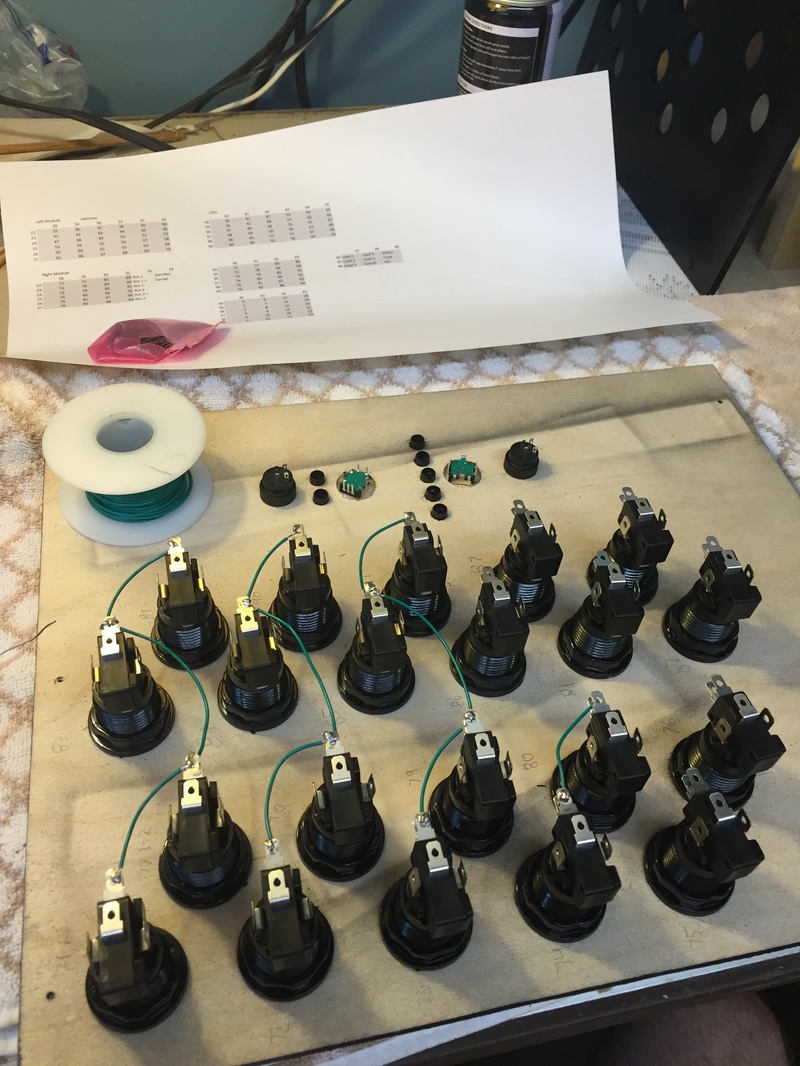
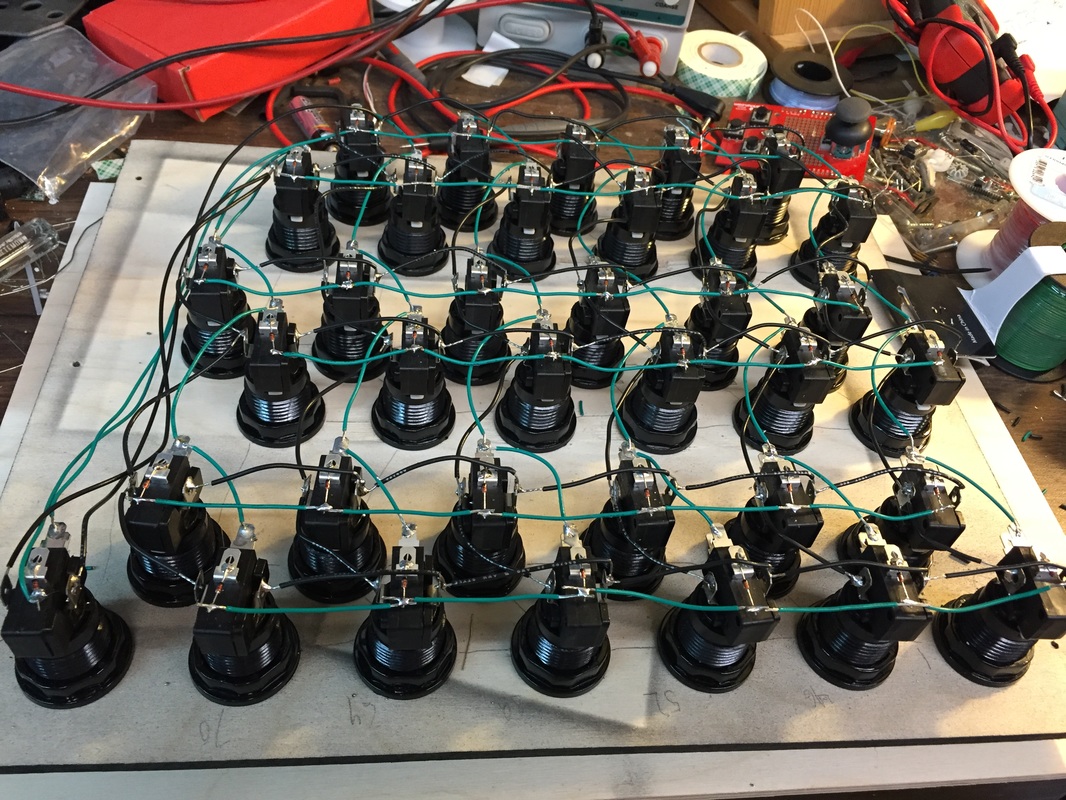
Unused modules and future plans
I have built two modules that aren't in use today: a stop board, which consisted of a few rows of 15 or so light switches, and an expression pedal module. The expression pedals I built need work on the travel of each pedal, and the MIDI encoding method needs to be improved.
While I was working on plans for the keyboard stack, I drew plans for a set of "stop modules". These would consist of two wooden boxes with 40+ illuminated push-button switches to represent the stop draw knobs of a "real" organ. The main obstacle holding me back from building these was the cost, as I didn't have a steady income when I was designing these.
While I was working on plans for the keyboard stack, I drew plans for a set of "stop modules". These would consist of two wooden boxes with 40+ illuminated push-button switches to represent the stop draw knobs of a "real" organ. The main obstacle holding me back from building these was the cost, as I didn't have a steady income when I was designing these.